플러터
-
[ Flutter ] How to Debug Label remove?2021.12.10
-
(Dec 2021 기준) 구글 플레이스토어 앱 심사에 필요한 내용2021.12.09
-
Flutter 로딩 페이지 만들기(Splash Screen)2021.11.11
[ flutter ] A RenderFlex overflowed by * pixels ... 오류 간단하게 해결하기
Flutter Web 테스트 중에 반응형 동작을 수행하는지 확인해보았다가 생긴 오류입니다. 매우 단순한 오류이기에 수정하기 간편합니다. Row 혹은 Column으로 내용을 작성해나갈 때 Scrollable이 되지 않아 생기는 간단한 문제입니다.

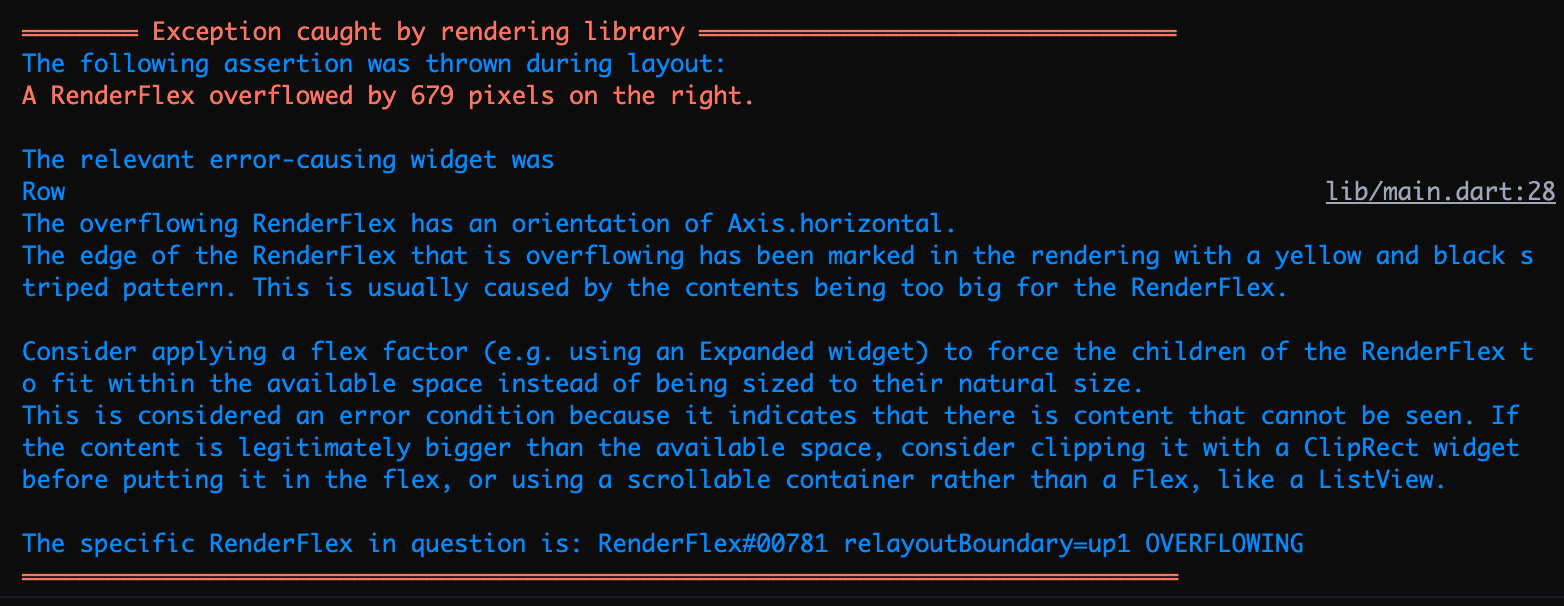
현재 단순 Row로 구성된 페이지를 SingleChildScrollView로 감싸주면 됩니다.
필요에 따라 scrollDirection을 추가해줍니다.

  SingleChildScrollView(
    scrollDirection: Axis.horizontal,
      child: Row(
        '코드 작성'
      ),
   ),

 ...
'IT > Develop' 카테고리의 다른 글
| [React] Axios로 API 호출하기 간단 예제 (0) | 2022.03.01 |
|---|---|
| DBeaver로 Jumpbox를 거쳐 AWS Aurora PostgreSQL 접속해보기 (0) | 2022.02.22 |
| [ 오류 해결 ] java.lang.RuntimeException: unable to instantiate activity ComponentInfo ... (0) | 2021.12.14 |
| [ Flutter ] ITMS-90078: Missing Push Notification Entitlement 오류 해결 (2) | 2021.12.14 |
| [ Flutter ] How to Debug Label remove? (0) | 2021.12.10 |
[ 오류 해결 ] java.lang.RuntimeException: unable to instantiate activity ComponentInfo ...

Flutter에서 앱 개발을 완료하고 안드로이드 배포를 준비하는 과정에서 생길 수 있는 간단한 오류에 대한 해결 방법입니다. java.lang.RuntimeException: unable to instantiate activity ComponentInfo 로 시작되는 오류 뒷부분에 java.lang.ClassNotFoundException: Didn't find class 부분을 확인해보면, 우리가 AndroidManifest에 작성해놓은 ApplicationID와 MainActivity 패키지 명이 일치하지 않아서 생긴 오류라는 것을 확인할 수 있습니다.
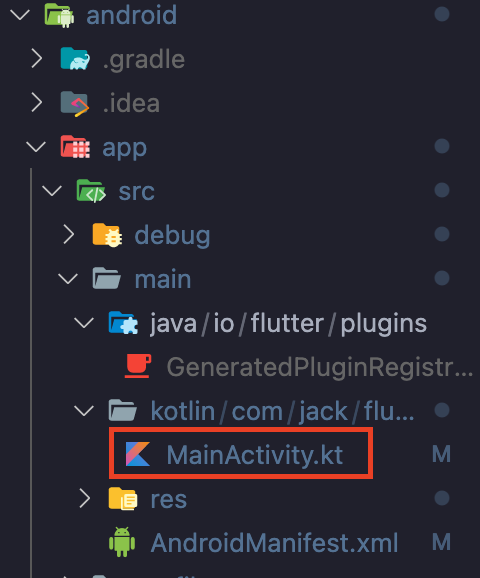
android - app - src - main - kotlin ... - MainActivity.kt 를 찾아서 Package 명을 확인해주면 간단하게 해결이 됩니다.
해당 오류를 해결하지 않고 빌드, 배포시 구글 플레이스토어 검토단계에서 걸러지지 않고 승인되는 것을 확인하였습니다. 꼭 직접 꼼꼼하게 체크하시고 오류 해결 후에 배포하시길 바랍니다.
'IT > Develop' 카테고리의 다른 글
| DBeaver로 Jumpbox를 거쳐 AWS Aurora PostgreSQL 접속해보기 (0) | 2022.02.22 |
|---|---|
| [ flutter ] A RenderFlex overflowed by * pixels ... 오류 간단하게 해결하기 (0) | 2021.12.20 |
| [ Flutter ] ITMS-90078: Missing Push Notification Entitlement 오류 해결 (2) | 2021.12.14 |
| [ Flutter ] How to Debug Label remove? (0) | 2021.12.10 |
| (Dec 2021 기준) 구글 플레이스토어 앱 심사에 필요한 내용 (0) | 2021.12.09 |
[ Flutter ] How to Debug Label remove?

Flutter로 앱을 제작하다가 AVD, iOS Simulator 등으로 디버깅할 때 뜨는 Debug 라벨 제거 방법입니다.
아래와 같이 Appbar를 사용하지 않는 앱을 개발할 때 특히 Debug 라벨이 더 거슬리기도 하는데, 제거 방법은 매우 간단합니다.

stl 혹은 stf Widget에서 return되는 MaterialApp 안에 다음의 명령어 한 줄이면 됩니다.
  @override
  Widget build(BuildContext context) {
    return MaterialApp(
        debugShowCheckedModeBanner: false,
        ...
        )
   }
debug 라벨을 제거하면 다음과 같이 깔끔한 디버깅 환경에서 테스트를 해볼 수 있습니다.

debug 라벨을 제거하지 않더라도 실제 Release 때는 라벨이 자동으로 제거가 되니 너무 걱정하지 않으셔도 됩니다.
일반적으로 main.dart 안에서만 모든 Widget을 구성한 경우가 아니라면 라벨을 제거하고 싶은 MaterialApp 마다 Debug 라벨 제거를 직접 해주셔야 합니다.
'IT > Develop' 카테고리의 다른 글
| [ 오류 해결 ] java.lang.RuntimeException: unable to instantiate activity ComponentInfo ... (0) | 2021.12.14 |
|---|---|
| [ Flutter ] ITMS-90078: Missing Push Notification Entitlement 오류 해결 (2) | 2021.12.14 |
| (Dec 2021 기준) 구글 플레이스토어 앱 심사에 필요한 내용 (0) | 2021.12.09 |
| [ React ] Linebreak-style 에러 처리 (1) | 2021.11.28 |
| iOS 개발 - 출시 전 TestFlight로 내부 테스트 하기 (0) | 2021.11.23 |
(Dec 2021 기준) 구글 플레이스토어 앱 심사에 필요한 내용

Flutter에서 앱을 작성하고, 구글 플레이스토어에 심사를 제출하기 전에 필요한 내용들을 정리.
(추후에 스크린샷을 추가하여 수정할 예정)
1. 앱 서명하기
Mac 기준 keystore 만드는 명령어.
keytool -genkey -v -keystore ~/key.jks -keyalg RSA -keysize 2048 -validity 10000 -alias key
여기서 생성된 파일은 공개 저장소에 올리지 말 것.
2. app/build.gradle 에서
- version Code 설정
- applicationID 작성
- signingConfigs 만들고 buildTypes를 debug에서 release로 변경
- keystoreProperties 작성
- 2021.12월 기준 TargetSdkVersion은 30 이상으로 작성되어야함
3. android 폴더에서
터미널에서 flutter build appbundle 입력하여 aab파일 생성 → build/app/outputs/bundle/release에 app-release.aab 파일 있음
4. 개인정보처리방침 만들기
개인적으로 제작할 경우 관련 사이트(개인정보보호 포털)를 사용하고 이미 있는 경우 링크를 등록
5. 추가 필요한 내용
- 앱 액세스 권한
- 광고
- 컨텐츠 등급
- 타겟층
- 뉴스 앱
- 코로나19 접촉자 추적 앱 및 검사 결과 공유 앱
- 데이터 보안
- 웹 카테고리 선택 및 세부정보 제공
- 스토어 등록정보 설정
- 앱 이름, 80자 설명, 4000자 자세한 설명.
- 그래픽
- 앱 아이콘(512x512)
- 그래픽 이미지(1024x500)
- 스크린샷 16:9 비율 320px~3840px, 2~8장
- 7인치 태블릿 스크린샷(16:9 320x3840)
- 10인치 태블릿 스크린샷(16:9 320x3840)
'IT > Develop' 카테고리의 다른 글
| [ Flutter ] ITMS-90078: Missing Push Notification Entitlement 오류 해결 (2) | 2021.12.14 |
|---|---|
| [ Flutter ] How to Debug Label remove? (0) | 2021.12.10 |
| [ React ] Linebreak-style 에러 처리 (1) | 2021.11.28 |
| iOS 개발 - 출시 전 TestFlight로 내부 테스트 하기 (0) | 2021.11.23 |
| 구글 PlayStore 내부 테스트, 내부 앱 공유 사용 권한 얻는 방법 (0) | 2021.11.22 |
Flutter 로딩 페이지 만들기(Splash Screen)

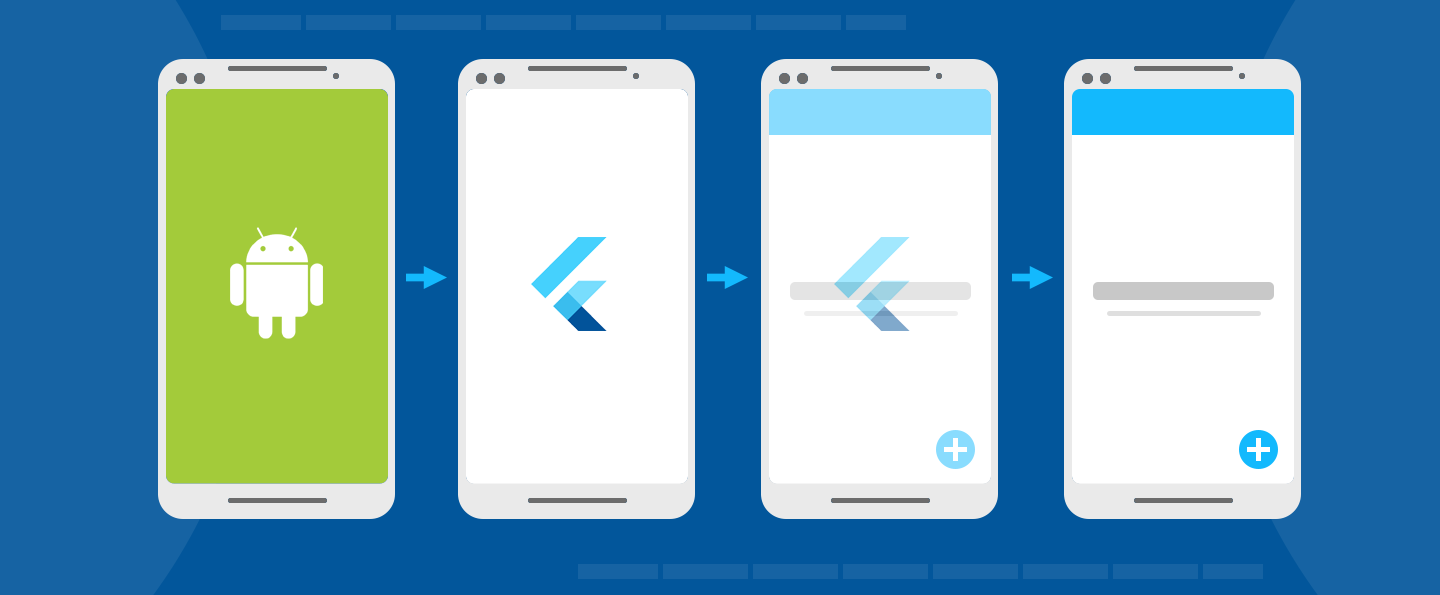
모바일 앱을 실행했을 때 가장 먼저 보이는 페이지는 주로 로딩 페이지일 것입니다. 앱을 실행시키자마자 바로 메인 페이지가 뜨지 않고 대부분은 이런 로딩 페이지를 띄우죠. Flutter에서는 이 로딩 페이지를 Splash Screen이라고 부릅니다.
별도의 페이지를 구성하고 로고와 백그라운드 이미지를 구성할 필요없이 Flutter_native_splash를 사용하여 간편하게 이러한 Splash Screen을 구현할 수 있습니다. Flutter_native_splash는 현재 1.3.1 버전이 나와있으며 Flutter 2.0의 Null Safety가 구현되어 있습니다. 현재 두 가지 방법으로 이 Flutter_native_splash를 구현할 수 있는데 간단한 방법으로 제작하는 방법에 대해 살펴보겠습니다.
우선 사용하기 위해 pubspec.yaml에 Flutter_native_splash를 추가하고 flutter pub get 해줍니다.
dev_dependencies:
  flutter_native_splash: ^1.3.1
Flutter_native_splash 소개 페이지에 보시면 코드 내에 직접 작성하는 방식으로 구현한 예제가 있고, 종속성 설치시에 백그라운드 컬러 혹은 이미지를 pubspec.yaml에 직접 등록하여 사용하는 방식 또한 나와있습니다. 위에서 언급한 두가지 적용 방법이 바로 이것입니다. pubspec.yaml에 Color와 image 주소를 작성해주면 간편하게 사용할 수 있기에 저는 다음의 방법을 사용하였습니다.
flutter_native_splash:

  color: "#42a5f5"
  image: images/main.png
  # 변경사항 필요시 flutter pub run flutter_native_splash:create 와 remove 사용
color는 ""를 사용해서 작성해주면 되고, 이미지의 경우 이미지 파일의 주소를 작성해주시면 됩니다. 작성이 모두 끝이 났다면 저장하고 터미널 창에서 flutter pub run flutter_native_splash:create를 입력해주세요.
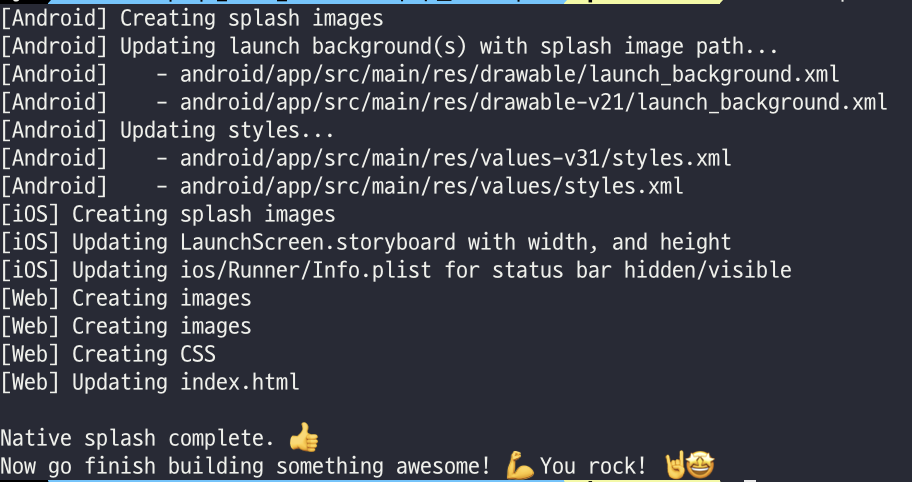
create를 통해 등록하고, remove를 사용하여 삭제해주시면 됩니다. 변경사항이 있을 때는 먼저 remove를 통해 지워주신 후에 변경사항이 적용된 버전을 다시 create로 등록해주세요.
저는 위에서 필요한 부분만 간단하게 사용하여 pubspec.yaml 파일에 작성했지만 Flutter_native_splash에서는 다음과 같은 기본적인 샘플을 제공하고 있습니다.
flutter_native_splash:

  # This package generates native code to customize Flutter's default white native splash screen
  # with background color and splash image.
  # Customize the parameters below, and run the following command in the terminal:
  # flutter pub run flutter_native_splash:create
  # To restore Flutter's default white splash screen, run the following command in the terminal:
  # flutter pub run flutter_native_splash:remove

  # color or background_image is the only required parameter.  Use color to set the background
  # of your splash screen to a solid color.  Use background_image to set the background of your
  # splash screen to a png image.  This is useful for gradients. The image will be stretch to the
  # size of the app. Only one parameter can be used, color and background_image cannot both be set.
  color: "#42a5f5"
  #background_image: "assets/background.png"

  # Optional parameters are listed below.  To enable a parameter, uncomment the line by removing
  # the leading # character.

  # The image parameter allows you to specify an image used in the splash screen.  It must be a
  # png file and should be sized for 4x pixel density.
  #image: assets/splash.png

  # The color_dark, background_image_dark, and image_dark are parameters that set the background
  # and image when the device is in dark mode. If they are not specified, the app will use the
  # parameters from above. If the image_dark parameter is specified, color_dark or
  # background_image_dark must be specified.  color_dark and background_image_dark cannot both be
  # set.
  #color_dark: "#042a49"
  #background_image_dark: "assets/dark-background.png"
  #image_dark: assets/splash-invert.png

  # The android, ios and web parameters can be used to disable generating a splash screen on a given
  # platform.
  #android: false
  #ios: false
  #web: false

  # The position of the splash image can be set with android_gravity, ios_content_mode, and
  # web_image_mode parameters.  All default to center.
  #
  # android_gravity can be one of the following Android Gravity (see
  # https://developer.android.com/reference/android/view/Gravity): bottom, center,
  # center_horizontal, center_vertical, clip_horizontal, clip_vertical, end, fill, fill_horizontal,
  # fill_vertical, left, right, start, or top.
  #android_gravity: center
  #
  # ios_content_mode can be one of the following iOS UIView.ContentMode (see
  # https://developer.apple.com/documentation/uikit/uiview/contentmode): scaleToFill,
  # scaleAspectFit, scaleAspectFill, center, top, bottom, left, right, topLeft, topRight,
  # bottomLeft, or bottomRight.
  #ios_content_mode: center
  #
  # web_image_mode can be one of the following modes: center, contain, stretch, and cover.
  #web_image_mode: center

  # To hide the notification bar, use the fullscreen parameter.  Has no affect in web since web
  # has no notification bar.  Defaults to false.
  # NOTE: Unlike Android, iOS will not automatically show the notification bar when the app loads.
  #       To show the notification bar, add the following code to your Flutter app:
  #       WidgetsFlutterBinding.ensureInitialized();
  #       SystemChrome.setEnabledSystemUIOverlays([SystemUiOverlay.bottom, SystemUiOverlay.top]);
  #fullscreen: true

  # If you have changed the name(s) of your info.plist file(s), you can specify the filename(s)
  # with the info_plist_files parameter.  Remove only the # characters in the three lines below,
  # do not remove any spaces:
  #info_plist_files:
  #  - 'ios/Runner/Info-Debug.plist'
  #  - 'ios/Runner/Info-Release.plist'
Flutter_native_splash Github에 직접 방문하셔서 자세한 내용을 확인하실 수 있습니다.
'IT > Develop' 카테고리의 다른 글
| Flutter 안드로이드 개발 - Install_failed_insufficient_storage 에러 해결 (0) | 2021.11.18 |
|---|---|
| iOS 개발, Xcode 아이폰 무선 디버깅하기 (0) | 2021.11.17 |
| [ MacOS ] Flutter 설치 및 초기 설정하기 (0) | 2021.11.03 |
| 마크다운(MarkDown) 문법 정리 (1) | 2021.10.05 |
| CSS로 footer 페이지 하단 고정하기 (0) | 2021.10.04 |